Getting started with a Frameable subscription trial
Purchasing and Activation
Once you have made a decision to begin a subscription trial for your selected app(s) your next step will be to access the subscription listing through Appsource and begin the registration and activation processes. There are two steps that must be completed to finish your enrollment.
Purchasing
In the selected Appsource listing, click ‘Get it Now,’ and follow the Appsource prompts for subscription details. Once you submit Appsource’s payment form, you will be presented with a confirmation page that has a link to Frameable’s website.


Activation
Follow the link on the Appsource confirmation page to finish your enrollment. The link will direct you to a Frameable page where you will be asked to log in via Microsoft. Once logged in, it will ask you to click a button that will activate your subscription. Once you click 'activate subscription,' you will see a brief loading screen followed by a confirmation that you have completed your enrollment.
Congratulations, you have successfully enrolled in and activated your subscription trial! Your next step will be to install your app.
Setting up for installation success
Microsoft Teams is a virtual workspace software that is set up and managed by an organization’s appointed ‘Teams administrator.’ It is not uncommon for these administrators to set up their virtual workspaces, or ‘tenants,’ with restrictions in place to stop employees from installing new apps without approval. We call these locked tenants.
If you belong to an organization that has a locked tenant, you will need your Teams administrator’s assistance to install your Frameable app.
How to tell if you're in a locked tenant
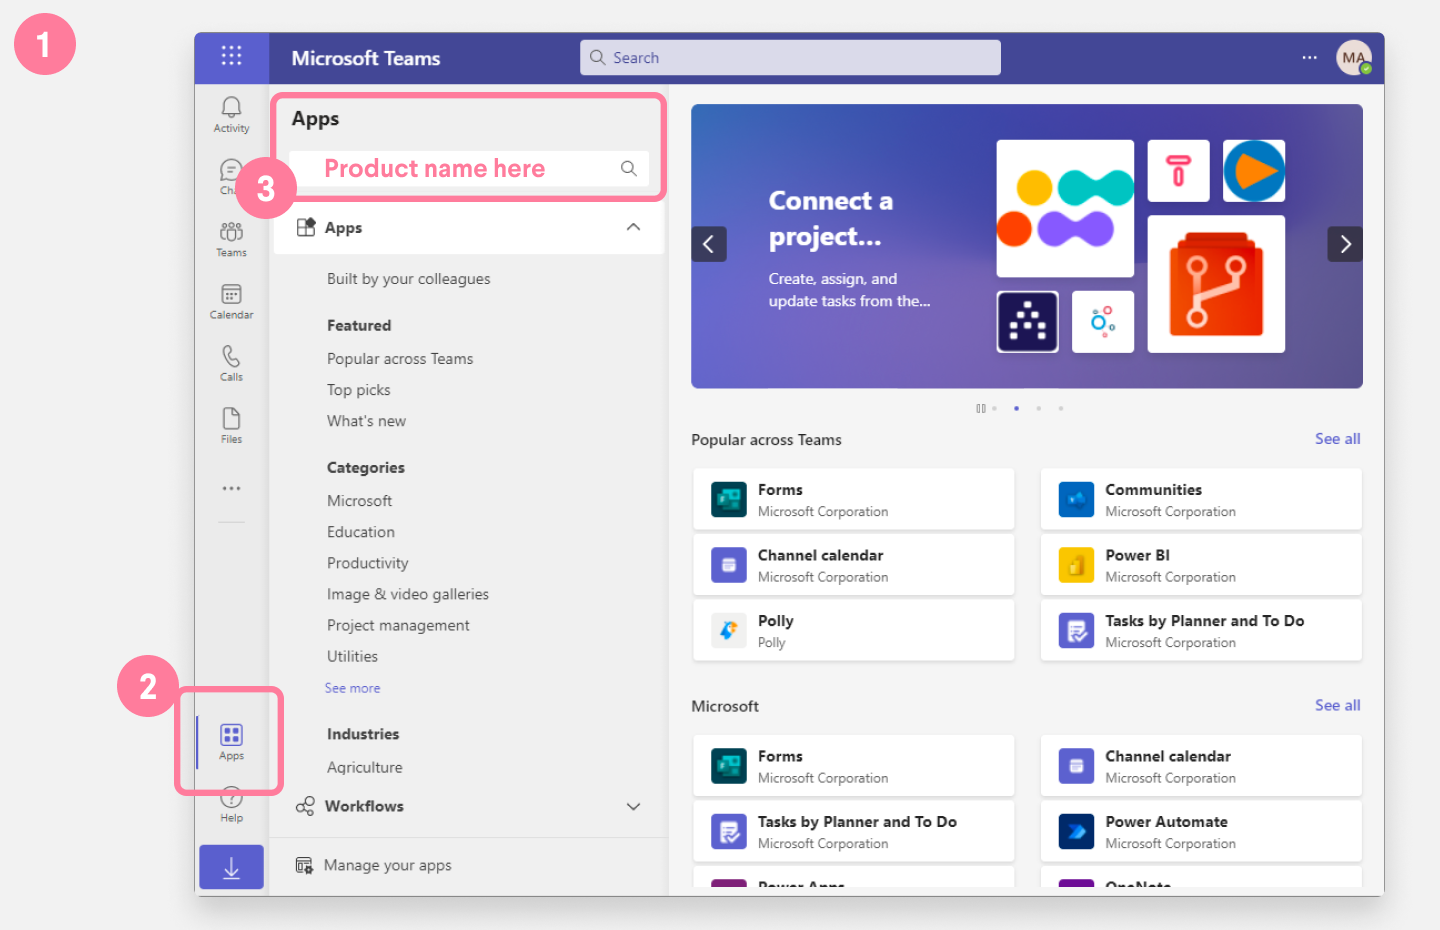
There is a simple test to see if your tenant is locked. Start by visiting the Teams office store by clicking the apps icon in the left side bar of your Teams instance.
Type in the name of your chosen Frameable app in the search bar in the upper left corner of the office store.

When you see your Frameable app appear in the search results, a locked tenant will display a lock icon over the app's logo image in the upper left corner of the listing. You will also see a the button on the upper right corner of the listing says 'Request.'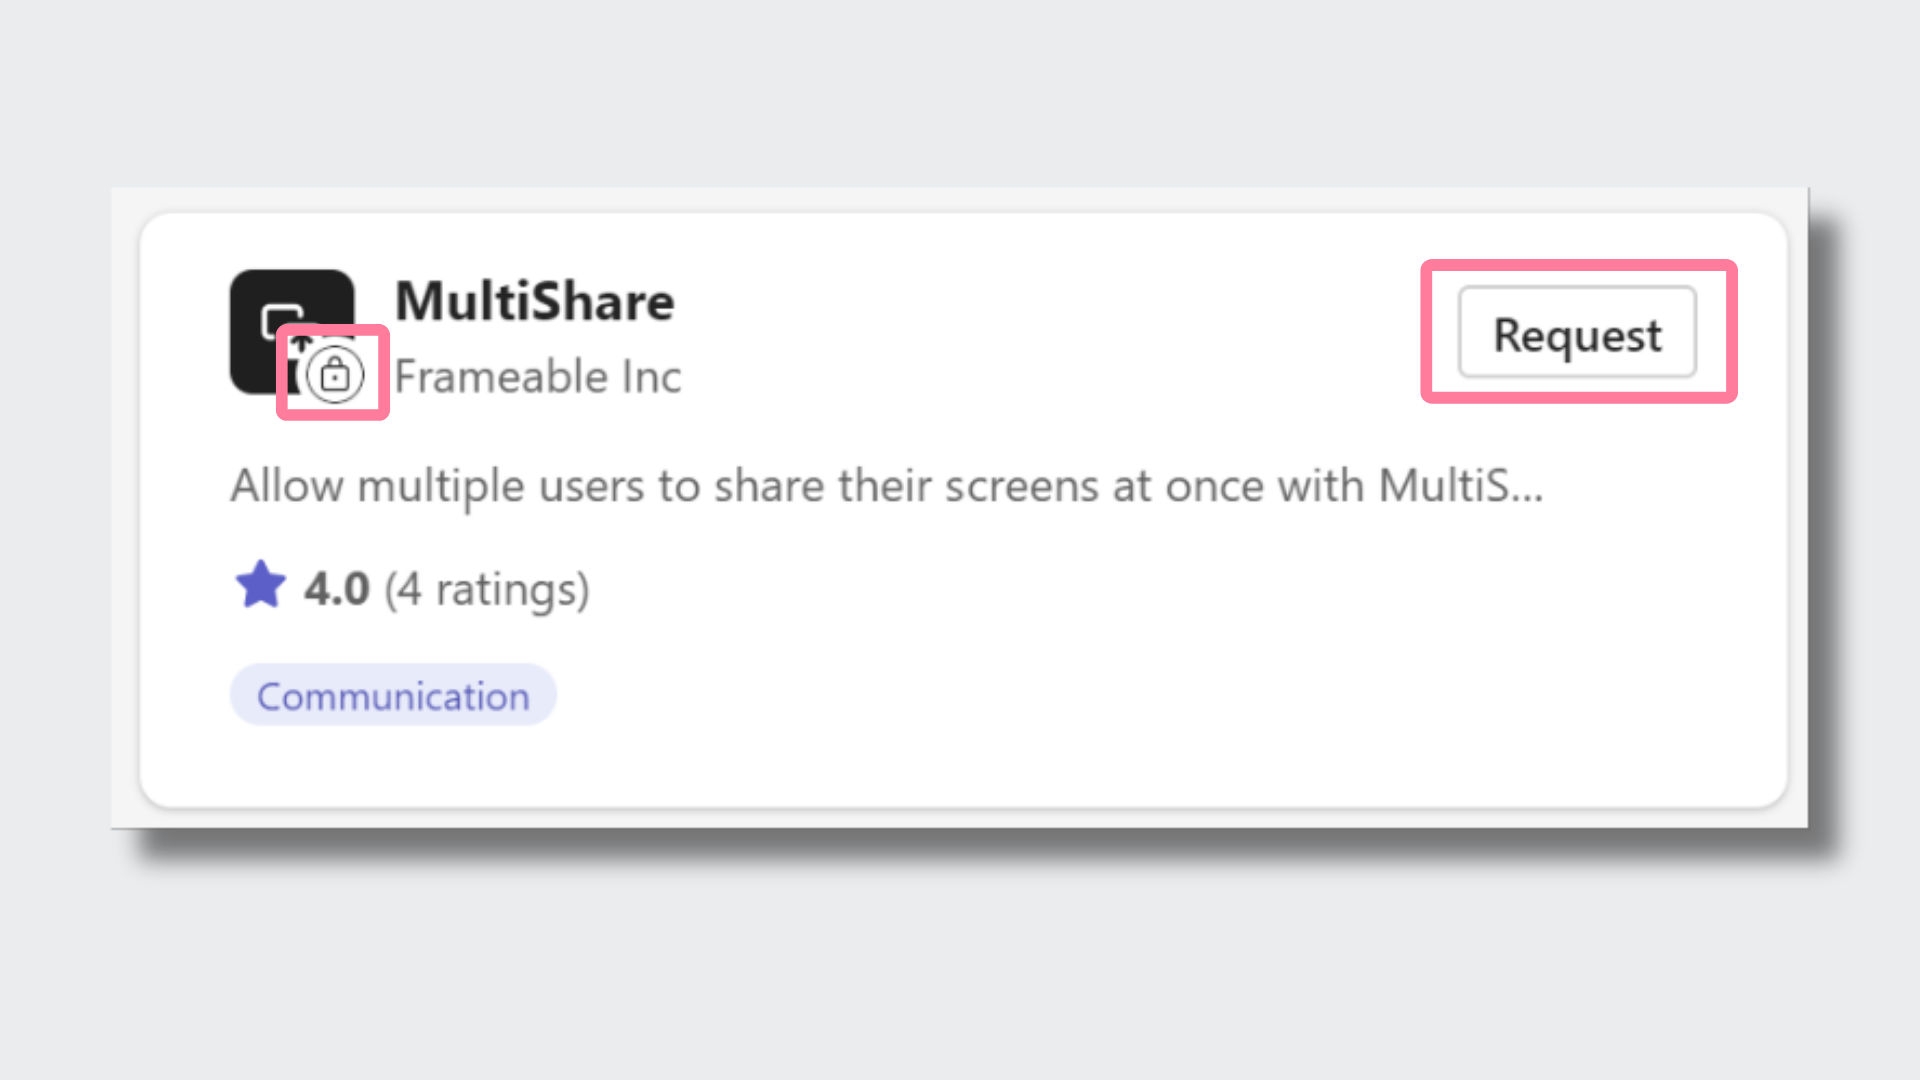
If your app listings look like this, you are in a locked tenant and will need to talk with your Teams administrator before trying to install. Click here if you are in a locked tenant.
If your tenant is not locked, you can continue on to installation.
Installation
Installing to your Teams instance
You can install any of the Frameable apps from the Teams office store from within your Teams instance.
Open Teams and click on "Apps" from the left side menu bar. This will open the Teams office store.
Search for the Frameable app you are ready to install.
From the app listing click "Add"
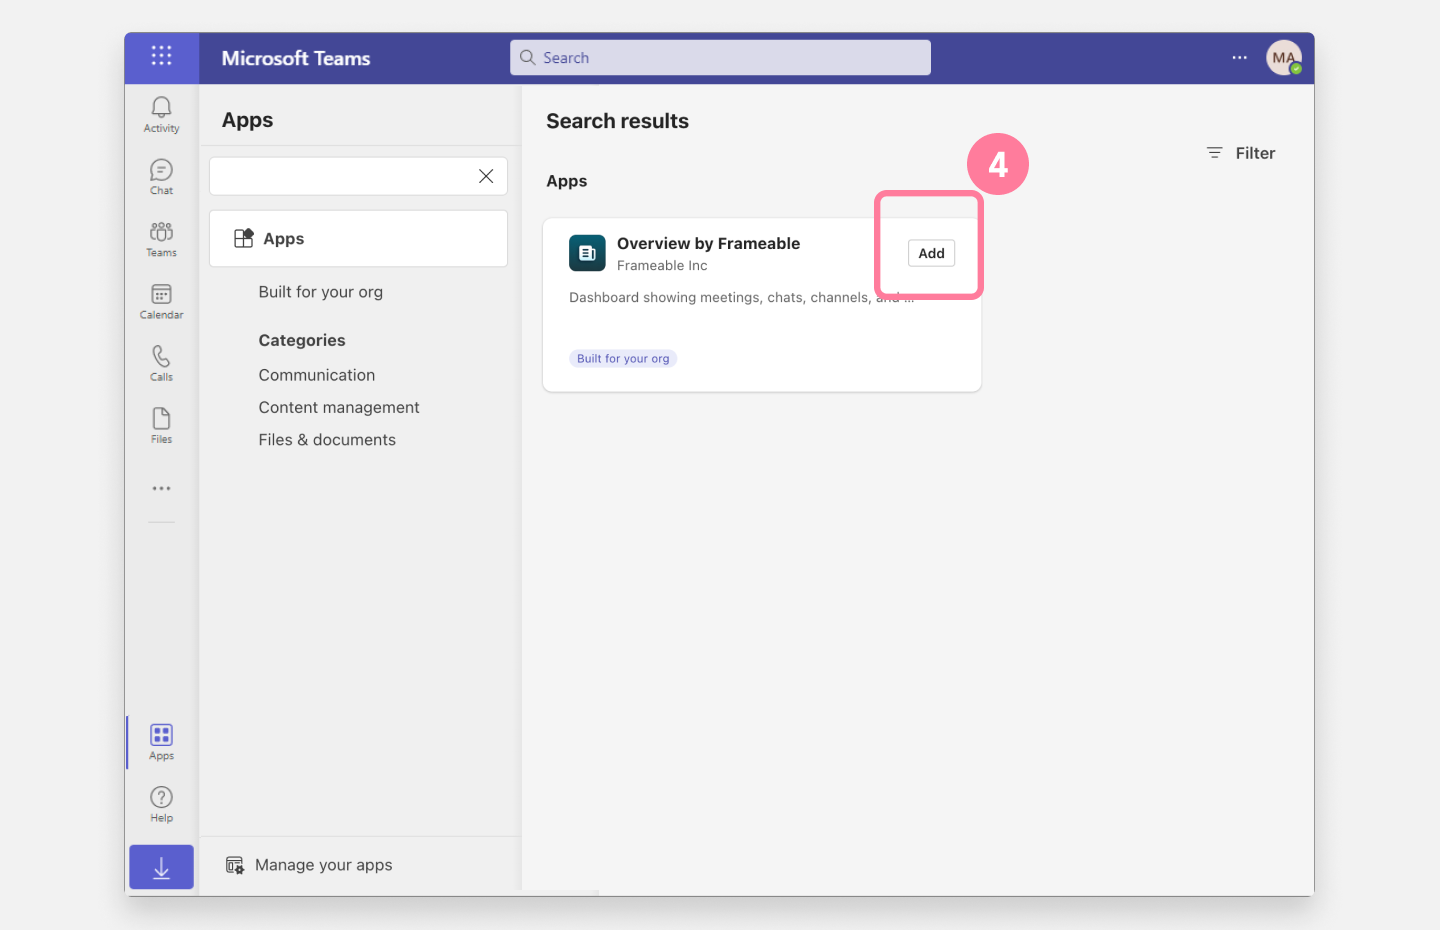
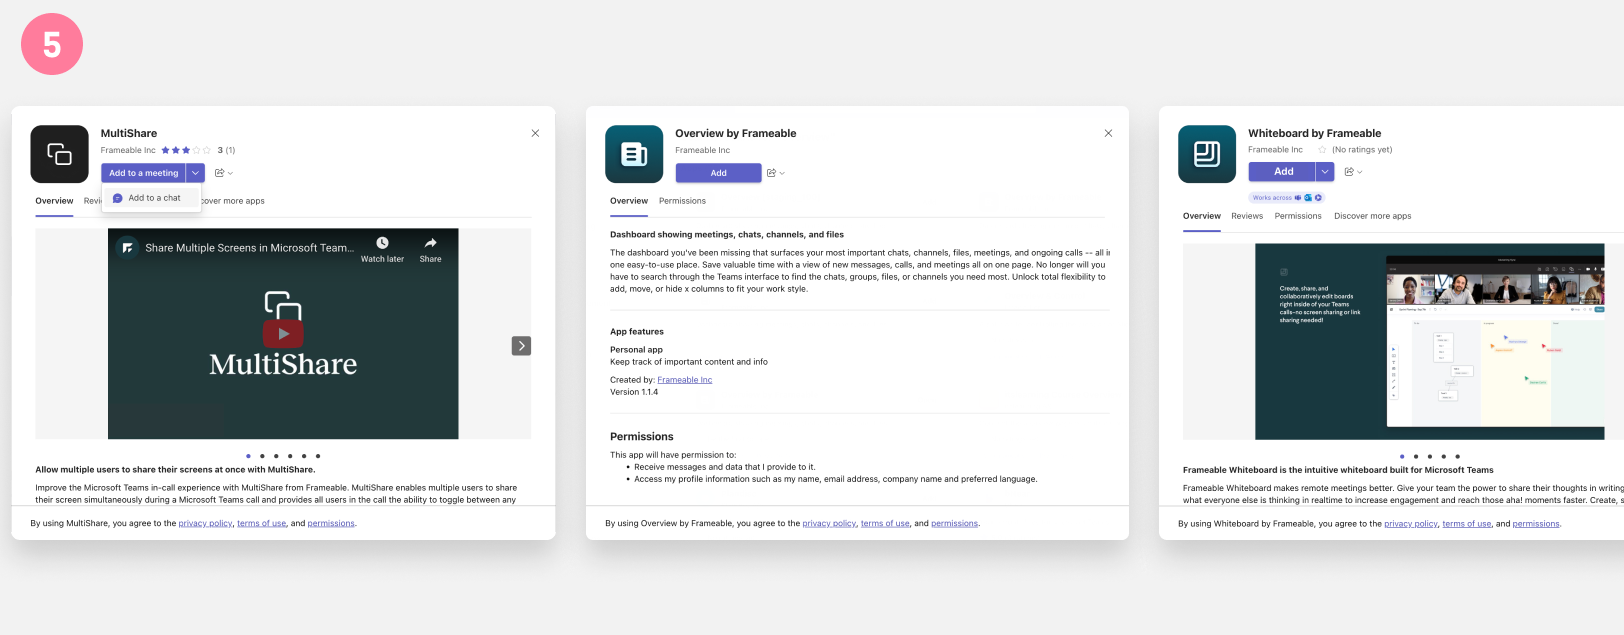
Once you click “Add” this will open up the app-specific install modal. Follow the steps until they are complete.
For app-specific details, follow these links. Multishare, Overview, Whiteboard.
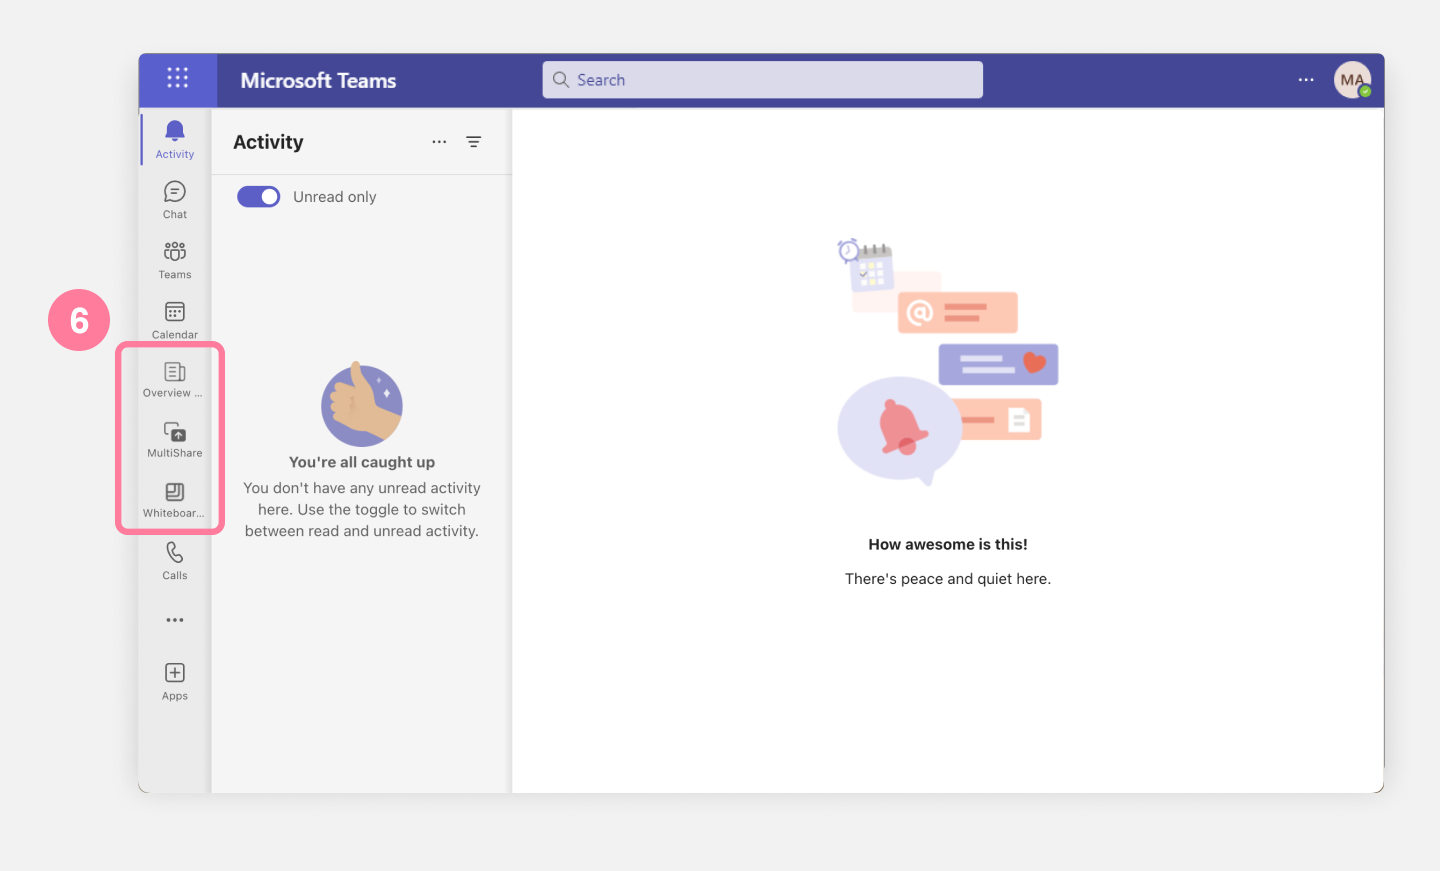
Once the installation process is complete, you will see the app icon on the left side bar in your Teams instance. If you right click on that icon, you will see the option to pin the app to the side bar for easy access in the future.
Enjoy your new app!
Congratulations! You're set and ready to start enjoying your new Frameable app.
Additional Resources
My tenant is locked
If your Teams tenant is locked, you will need the assistance of your Teams administrator in order to install your Frameable app. Administrators can use the instructions in this article to allow installation of Frameable apps to your tenant.
Once your tenant is unlocked, you are all set to install your apps! Click here to resume your installation journey.
Helpful links:
- Subscription trial listings in Appsource: appsource.microsoft.com
- Getting Started with MultiShare
- Getting Started with Whiteboard
- Getting Started with Overview
![]()
Need help?
We’re here to assist you with your Frameable questions!
Book time to meeting with customer support
Email customer support
Call customer support