MultiShare Installation Guide
Whether you're using the free or subscription version of MultiShare, installation the first step you will need to take before accessing and using it in a Teams call.
Installation
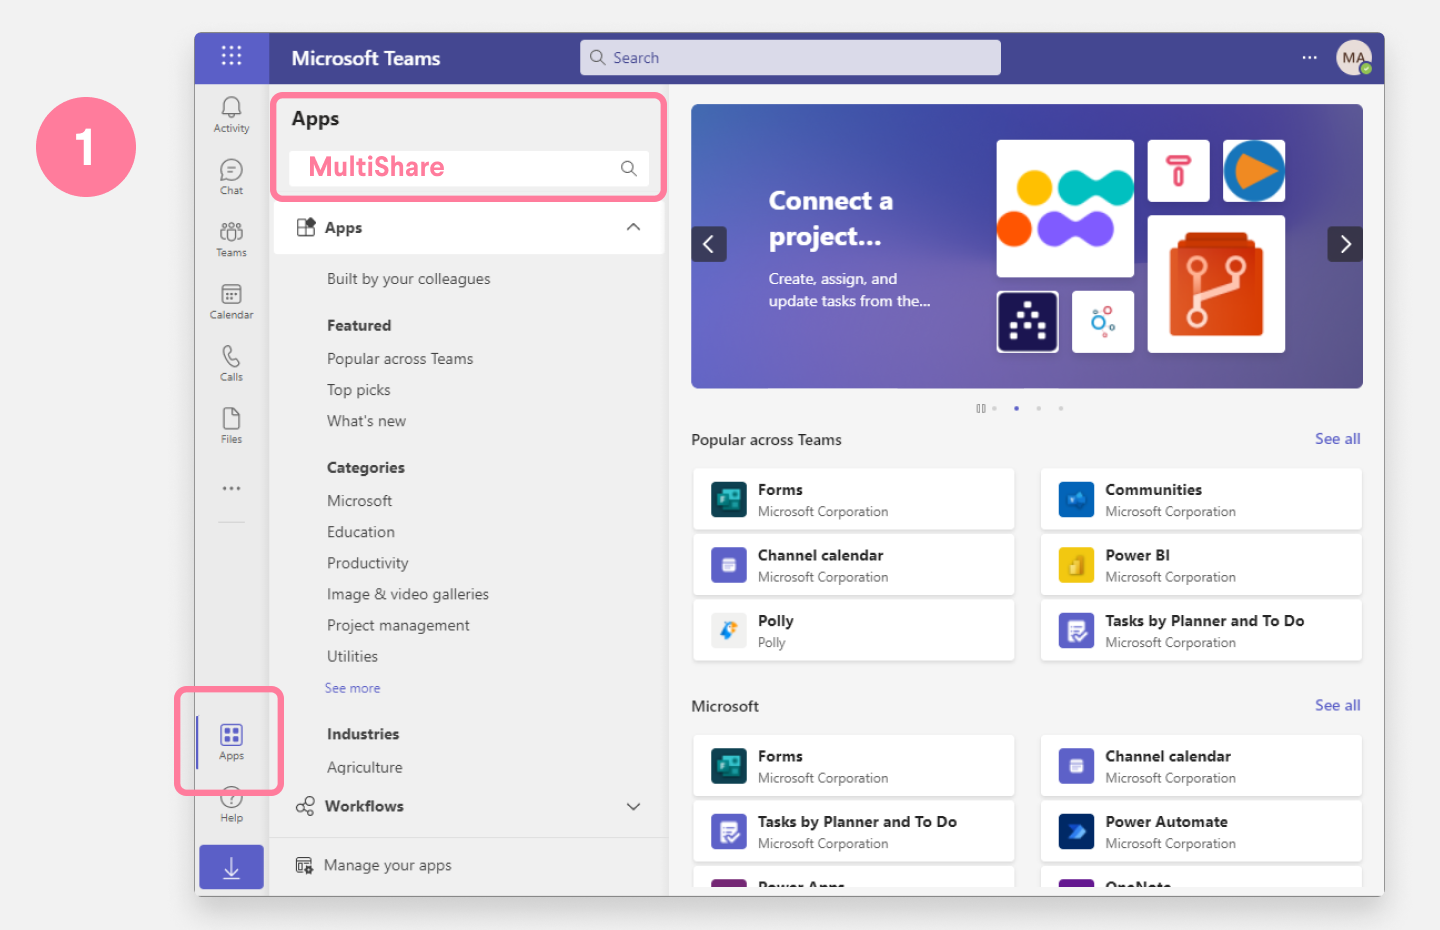
You can install MultiShare from the Teams office store from within your Teams instance.
In your Teams app, click on "Apps" and search for "MultiShare"

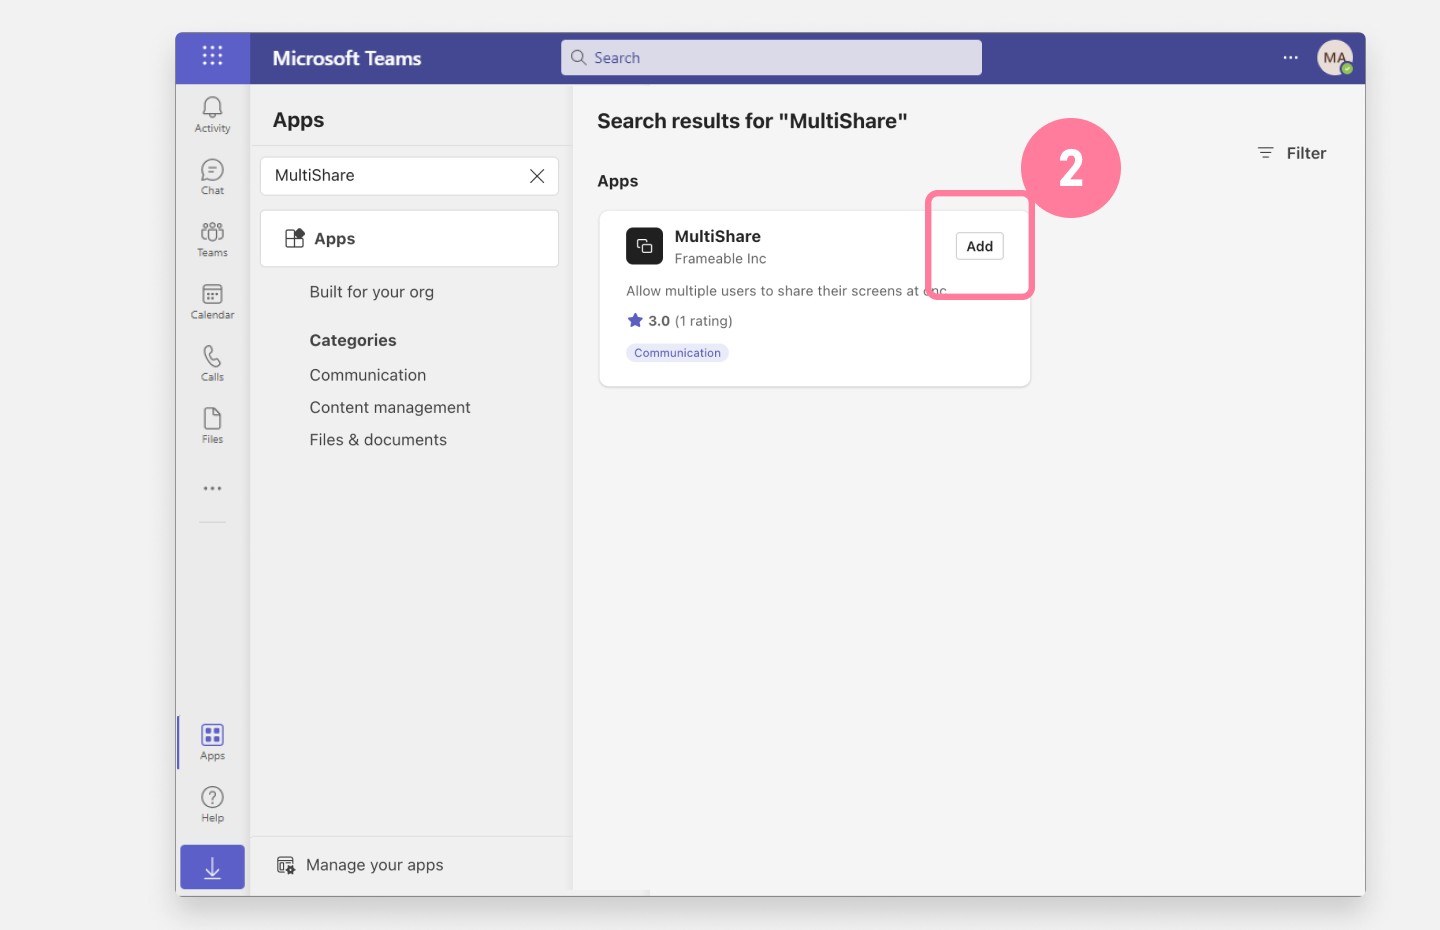
On the app info tile, click Add.
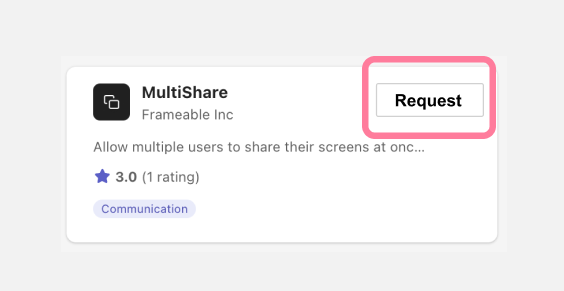
- ⚠️ If the app tile says “Request” please follow this article to unlock the MultiShare app from the Microsoft Admin Center.
- ⚠️ If the app tile says “Request” please follow this article to unlock the MultiShare app from the Microsoft Admin Center.
From the setup modal, you must choose to add MultiShare to a scheduled calendar meeting, a chat, or you can simply “Add for me”.
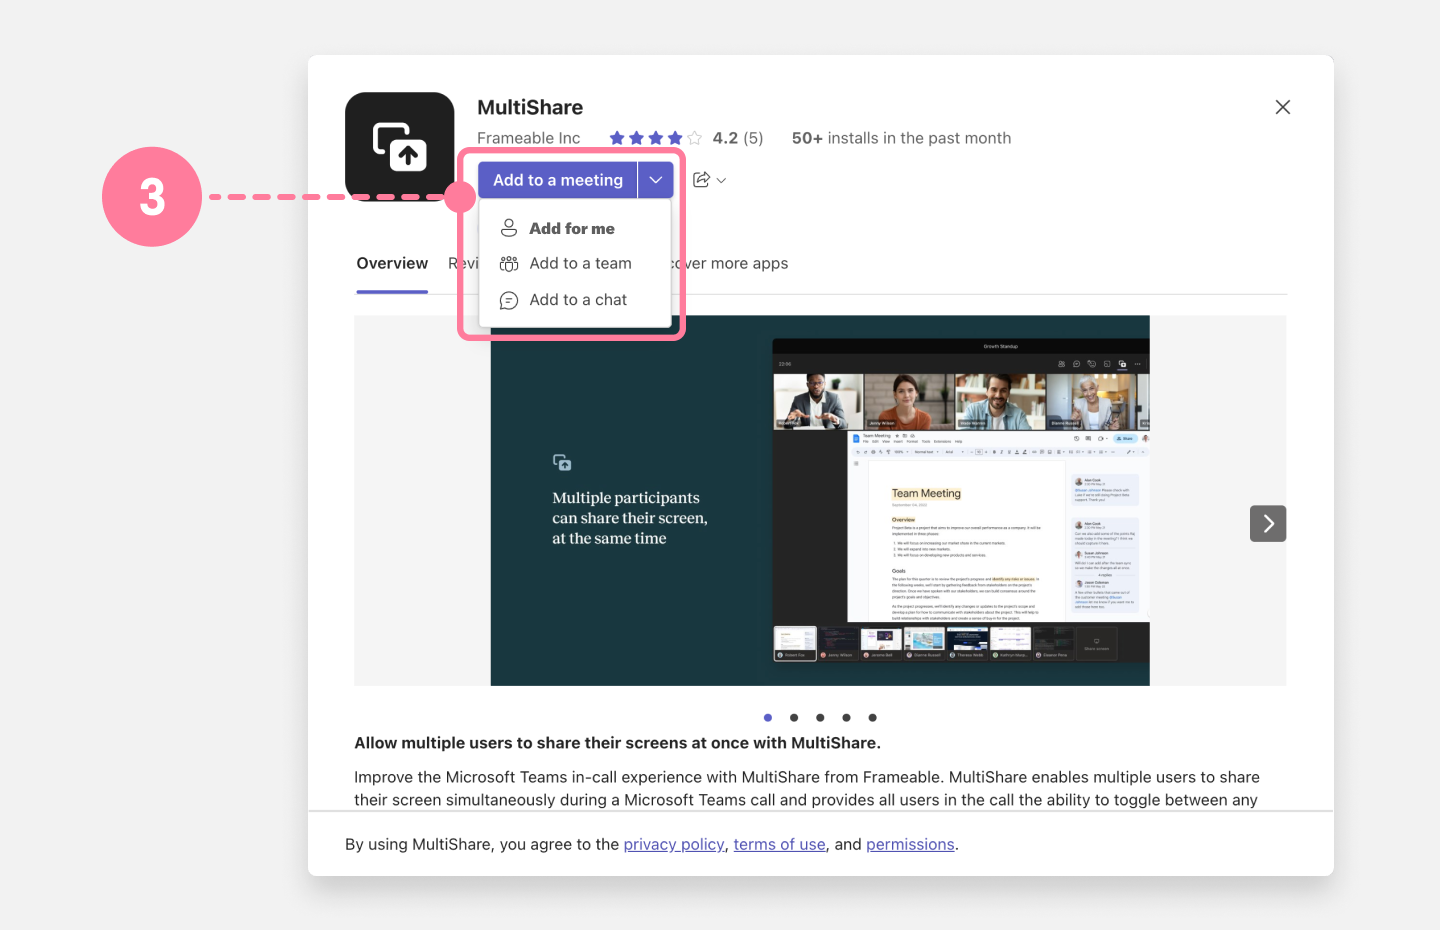
Whichever method you choose, you may have additional setup steps. (For this demonstration, we’ll select “Add for me”.)
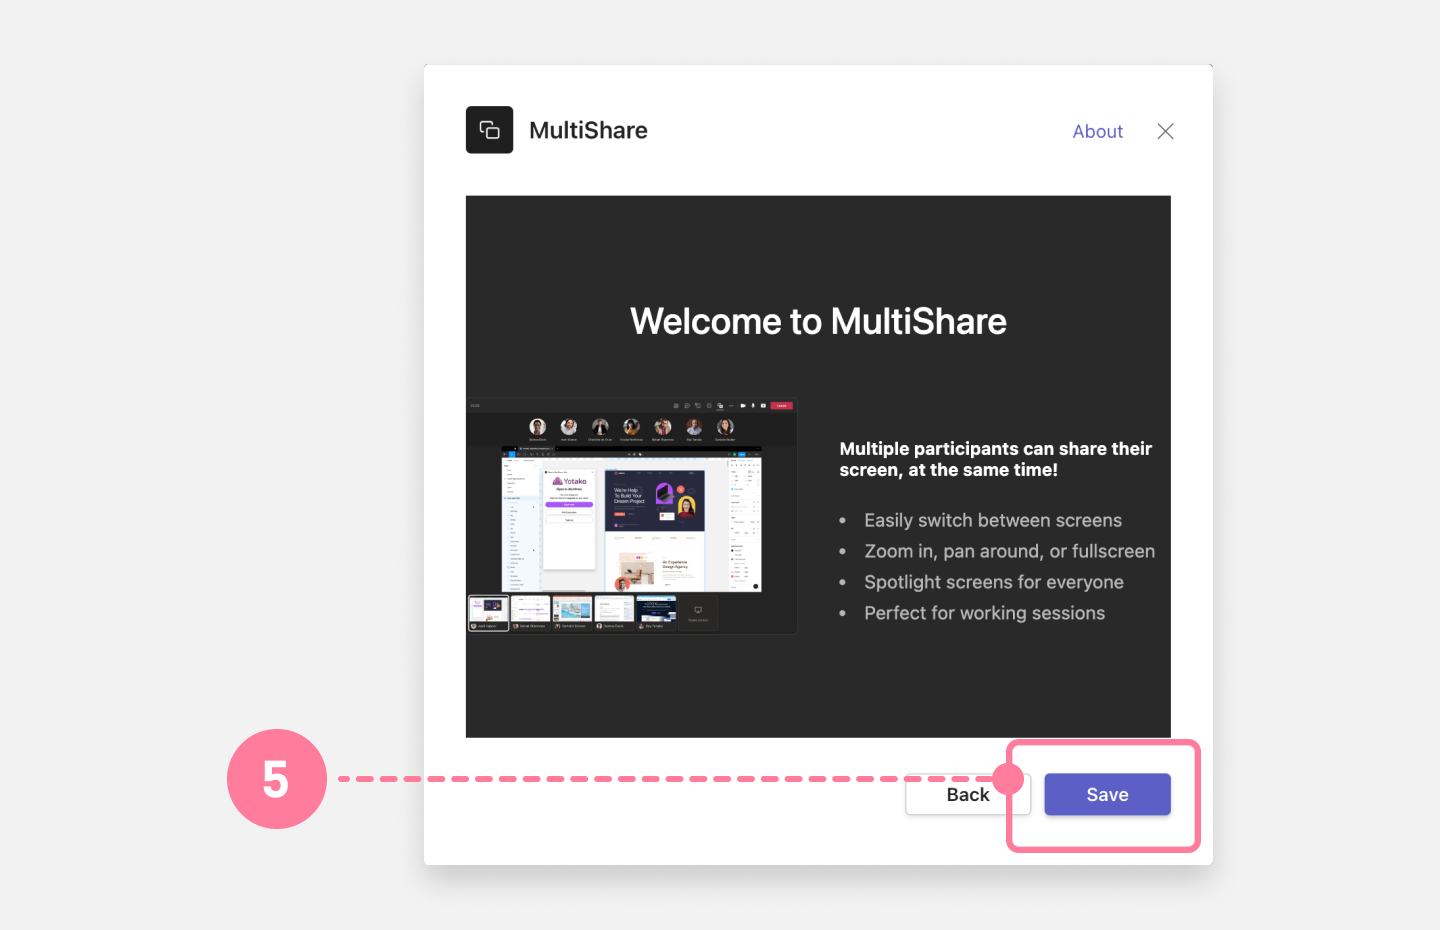
Lastly, you’ll see the MultiShare Welcome Modal, click Save.
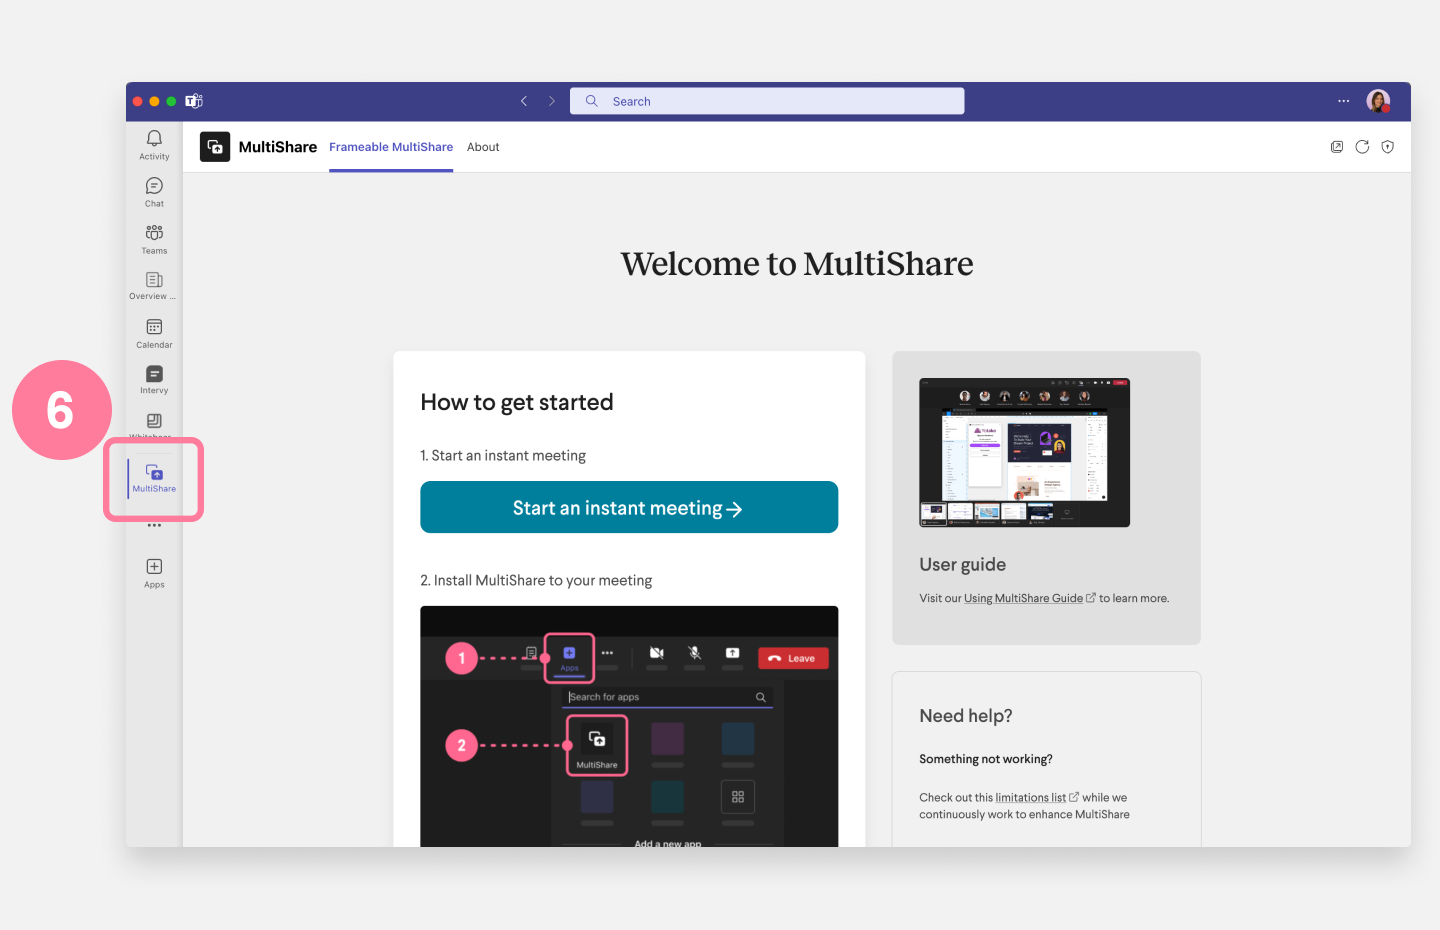
You’ll be redirected to the MultiShare tab. This means that you can now add MultiShare to any meeting that you organize by starting the meeting, clicking “apps” from the top, and selecting MultiShare.
✨Here is a related article on how to start your first in-call MultiShare: “Starting a MultiShare”
Additional Resources
My tenant is locked
If your Teams tenant is locked, you will need the assistance of your Teams administrator in order to install your Frameable app. Administrators can use the instructions in this article to allow installation of Frameable apps to your tenant.
Once your tenant is unlocked, you are all set to install your apps! Click here to resume your installation journey.![]()
Need help?
We’re here to assist you with your Frameable questions!
Book time: https://calendly.com/frameable
Email us at: support@frameable.com
Call Us: 646-710-1703